


Pumpkin-Squash
Last summer we grew a lot of pumpkins. And by “a lot,” I mean somewhere around 300 pounds of pumpkins.
I gave plenty away, cooked some down and froze it for later, and we ate our fair share. Even so, I still had roughly 150 pounds left over. Some became horse treats. Some went to the chickens. The rest eventually succumbed to gravity, mold, and neglect - making a rather large mess in the storage room before making the final trip to the compost pile.
Fortunately, we had much better luck with the yellow squash. We managed to keep up with most of it, although a couple escaped our notice and grew into yellow clubs that looked capable of defending the garden from intruders. For some reason, our dogs have no interest in eating raw squash. Kind of weird, given that they seem to eat everything else.
You would think that was the end of the story. Harvest over. Crops finished. Everything either eaten or composted or molded into oblivion.
Not quite.
Those discarded pumpkins were full of viable seeds, and many survived buried deep in the compost pile. This spring, we spread some of that finished compost over the front garden.
Almost immediately, enormous vines appeared.
“Wonderful,” I thought. “Free pumpkins.”
Well... maybe.
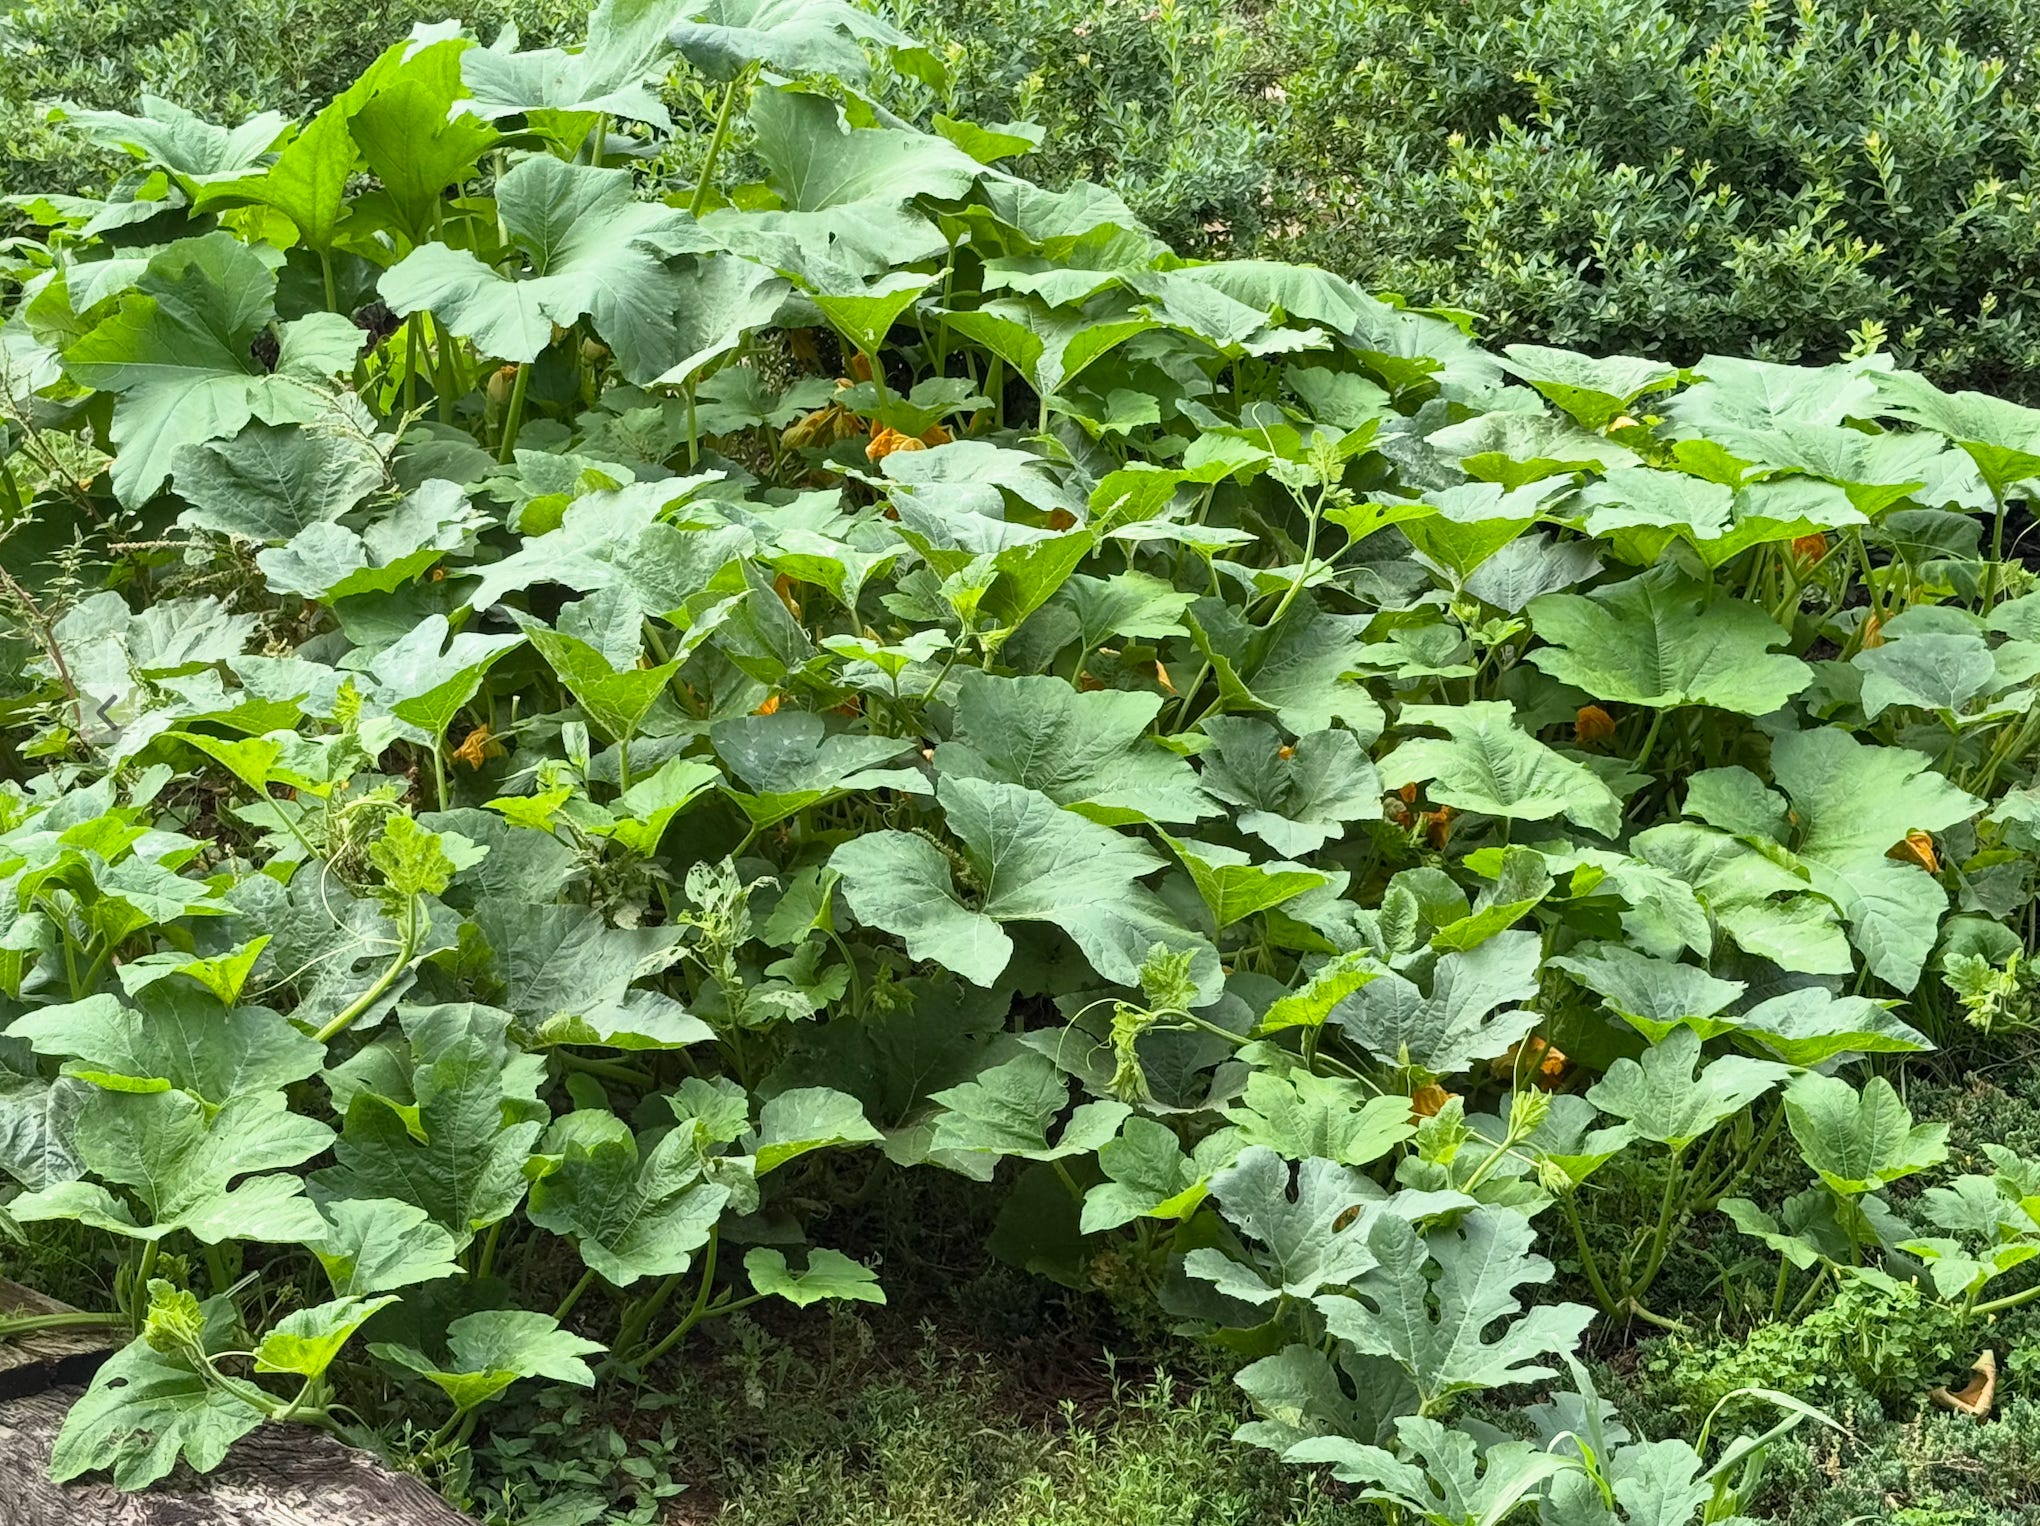
Here’s where things get interesting.
Pumpkins are squash, and squash are notorious for cross-pollinating with other compatible squash varieties. Bees don’t care what they’re carrying from flower to flower. They simply visit blossoms all day, happily mixing pollen between plants.
The vines certainly looked like pumpkins, but when the fruit began to develop, something was clearly different. They weren’t quite pumpkins, and they weren’t quite yellow squash either. The shape landed somewhere in between. The color leaned orange rather than bright yellow. The skin was noticeably thinner and bruised easily. The flesh was perfectly edible, but the texture and flavor were closer to a winter squash than the pie pumpkins we had planted the year before.


This is one of the quirks of open pollination.
For many vegetables, saving seed works beautifully. Tomatoes, beans, peas, and lettuce are often reliable if they’re isolated or naturally self-pollinating. Squash, on the other hand, are genetic gamblers. Unless you deliberately control pollination, you never quite know what the next generation is going to produce.
Sometimes you stumble onto something wonderful.
Sometimes you end up with some sort of watery, bitter-tasting squash that neither tastes good nor stores well. Which is why some seeds are best bought at the store, unless you have a heck of a lot of room to separate plants or grow only one squash type per year.
Carrots
One interesting surprise came from the carrots.
A few escaped harvest and remained buried in the garden over winter. Come spring, they sent up fresh green tops, bolted, flowered, and eventually produced thousands of tiny seeds. We collected them, and now they’re drying nicely, soon to be tucked away in an envelope for next year’s planting. Honestly, carrots as an ornamental never crossed my mind until I actually had last year’s carrots bloom. They have been a beautiful addition to the garden.
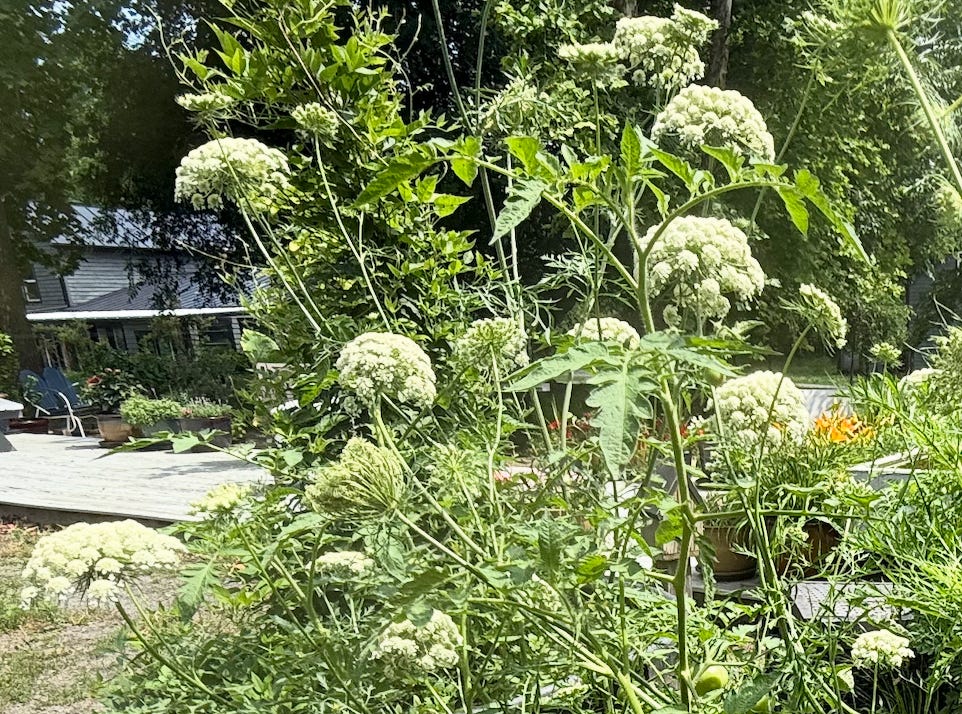
We now have volunteer carrot plants popping up all over the farm. The wind, birds, and probably a few overly helpful guinea fowl seem to have taken it upon themselves to distribute last year’s seed crop far more efficiently than we ever could.
I am curious whether carrots will naturalize in Virginia, given half the chance. I guess next year, we will find out!
Pasture work
Mowing has become the primary focus of farm chores this past month.
Lots and lots of pasture to mow!
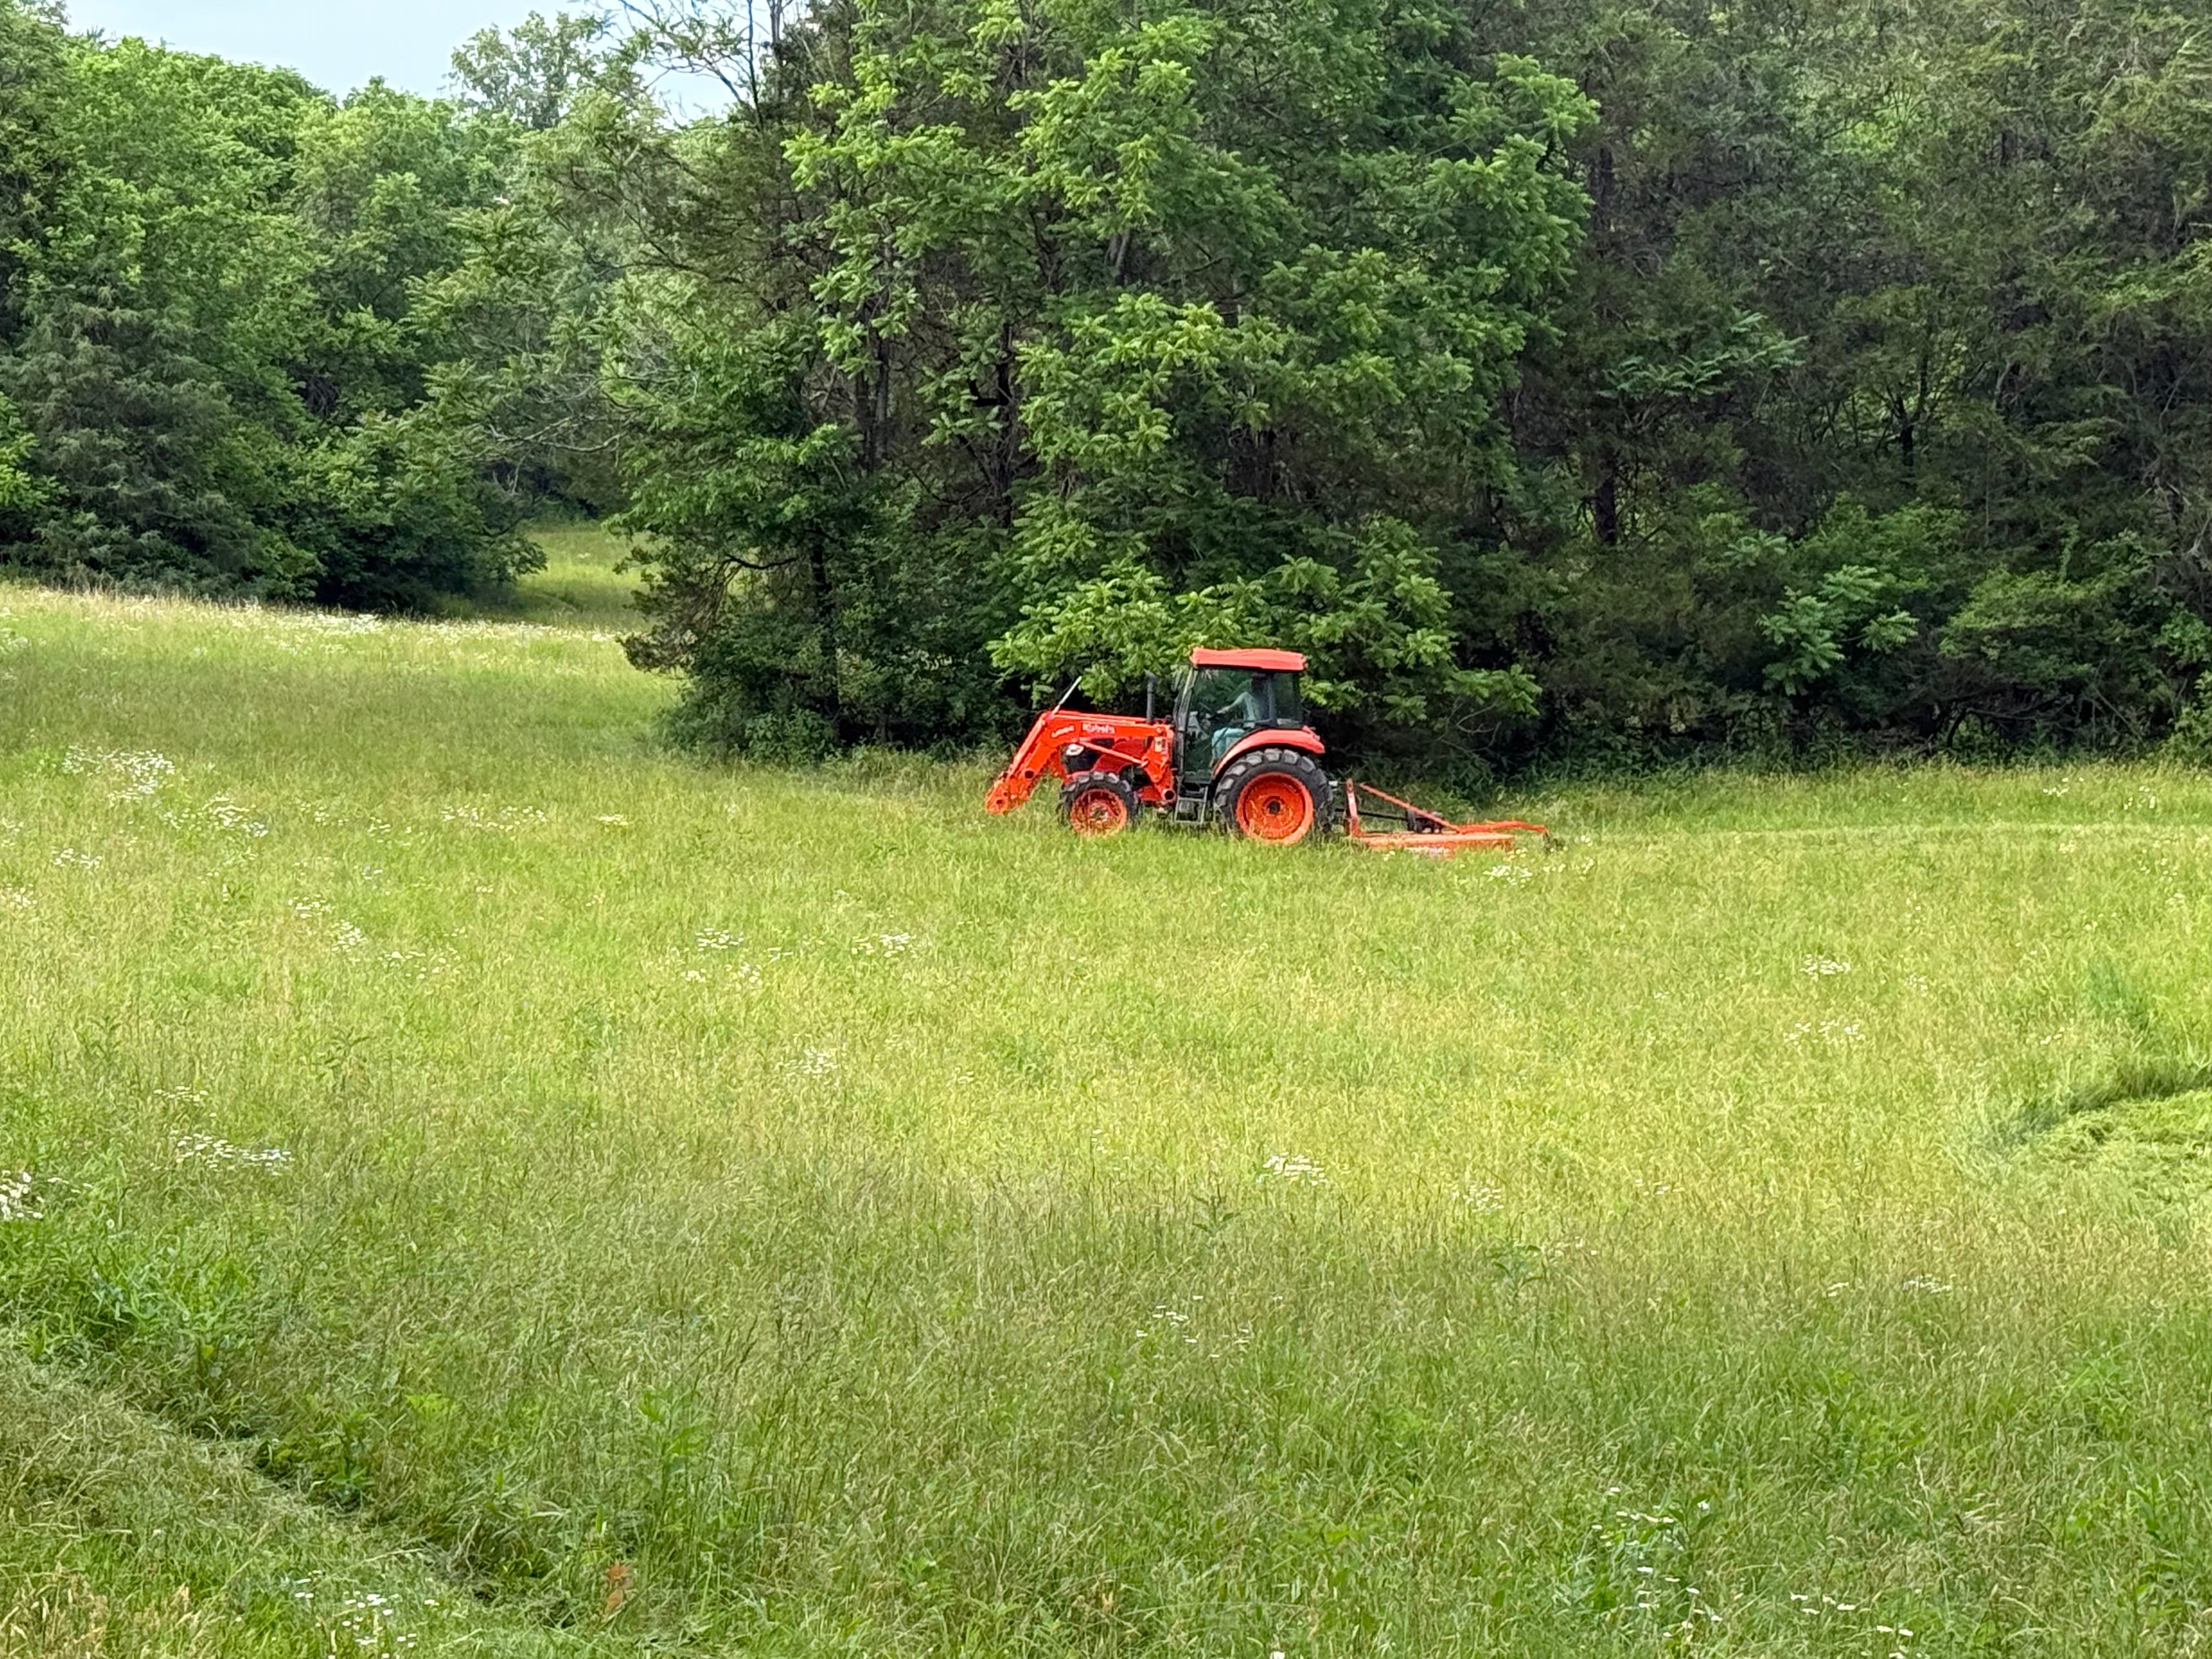
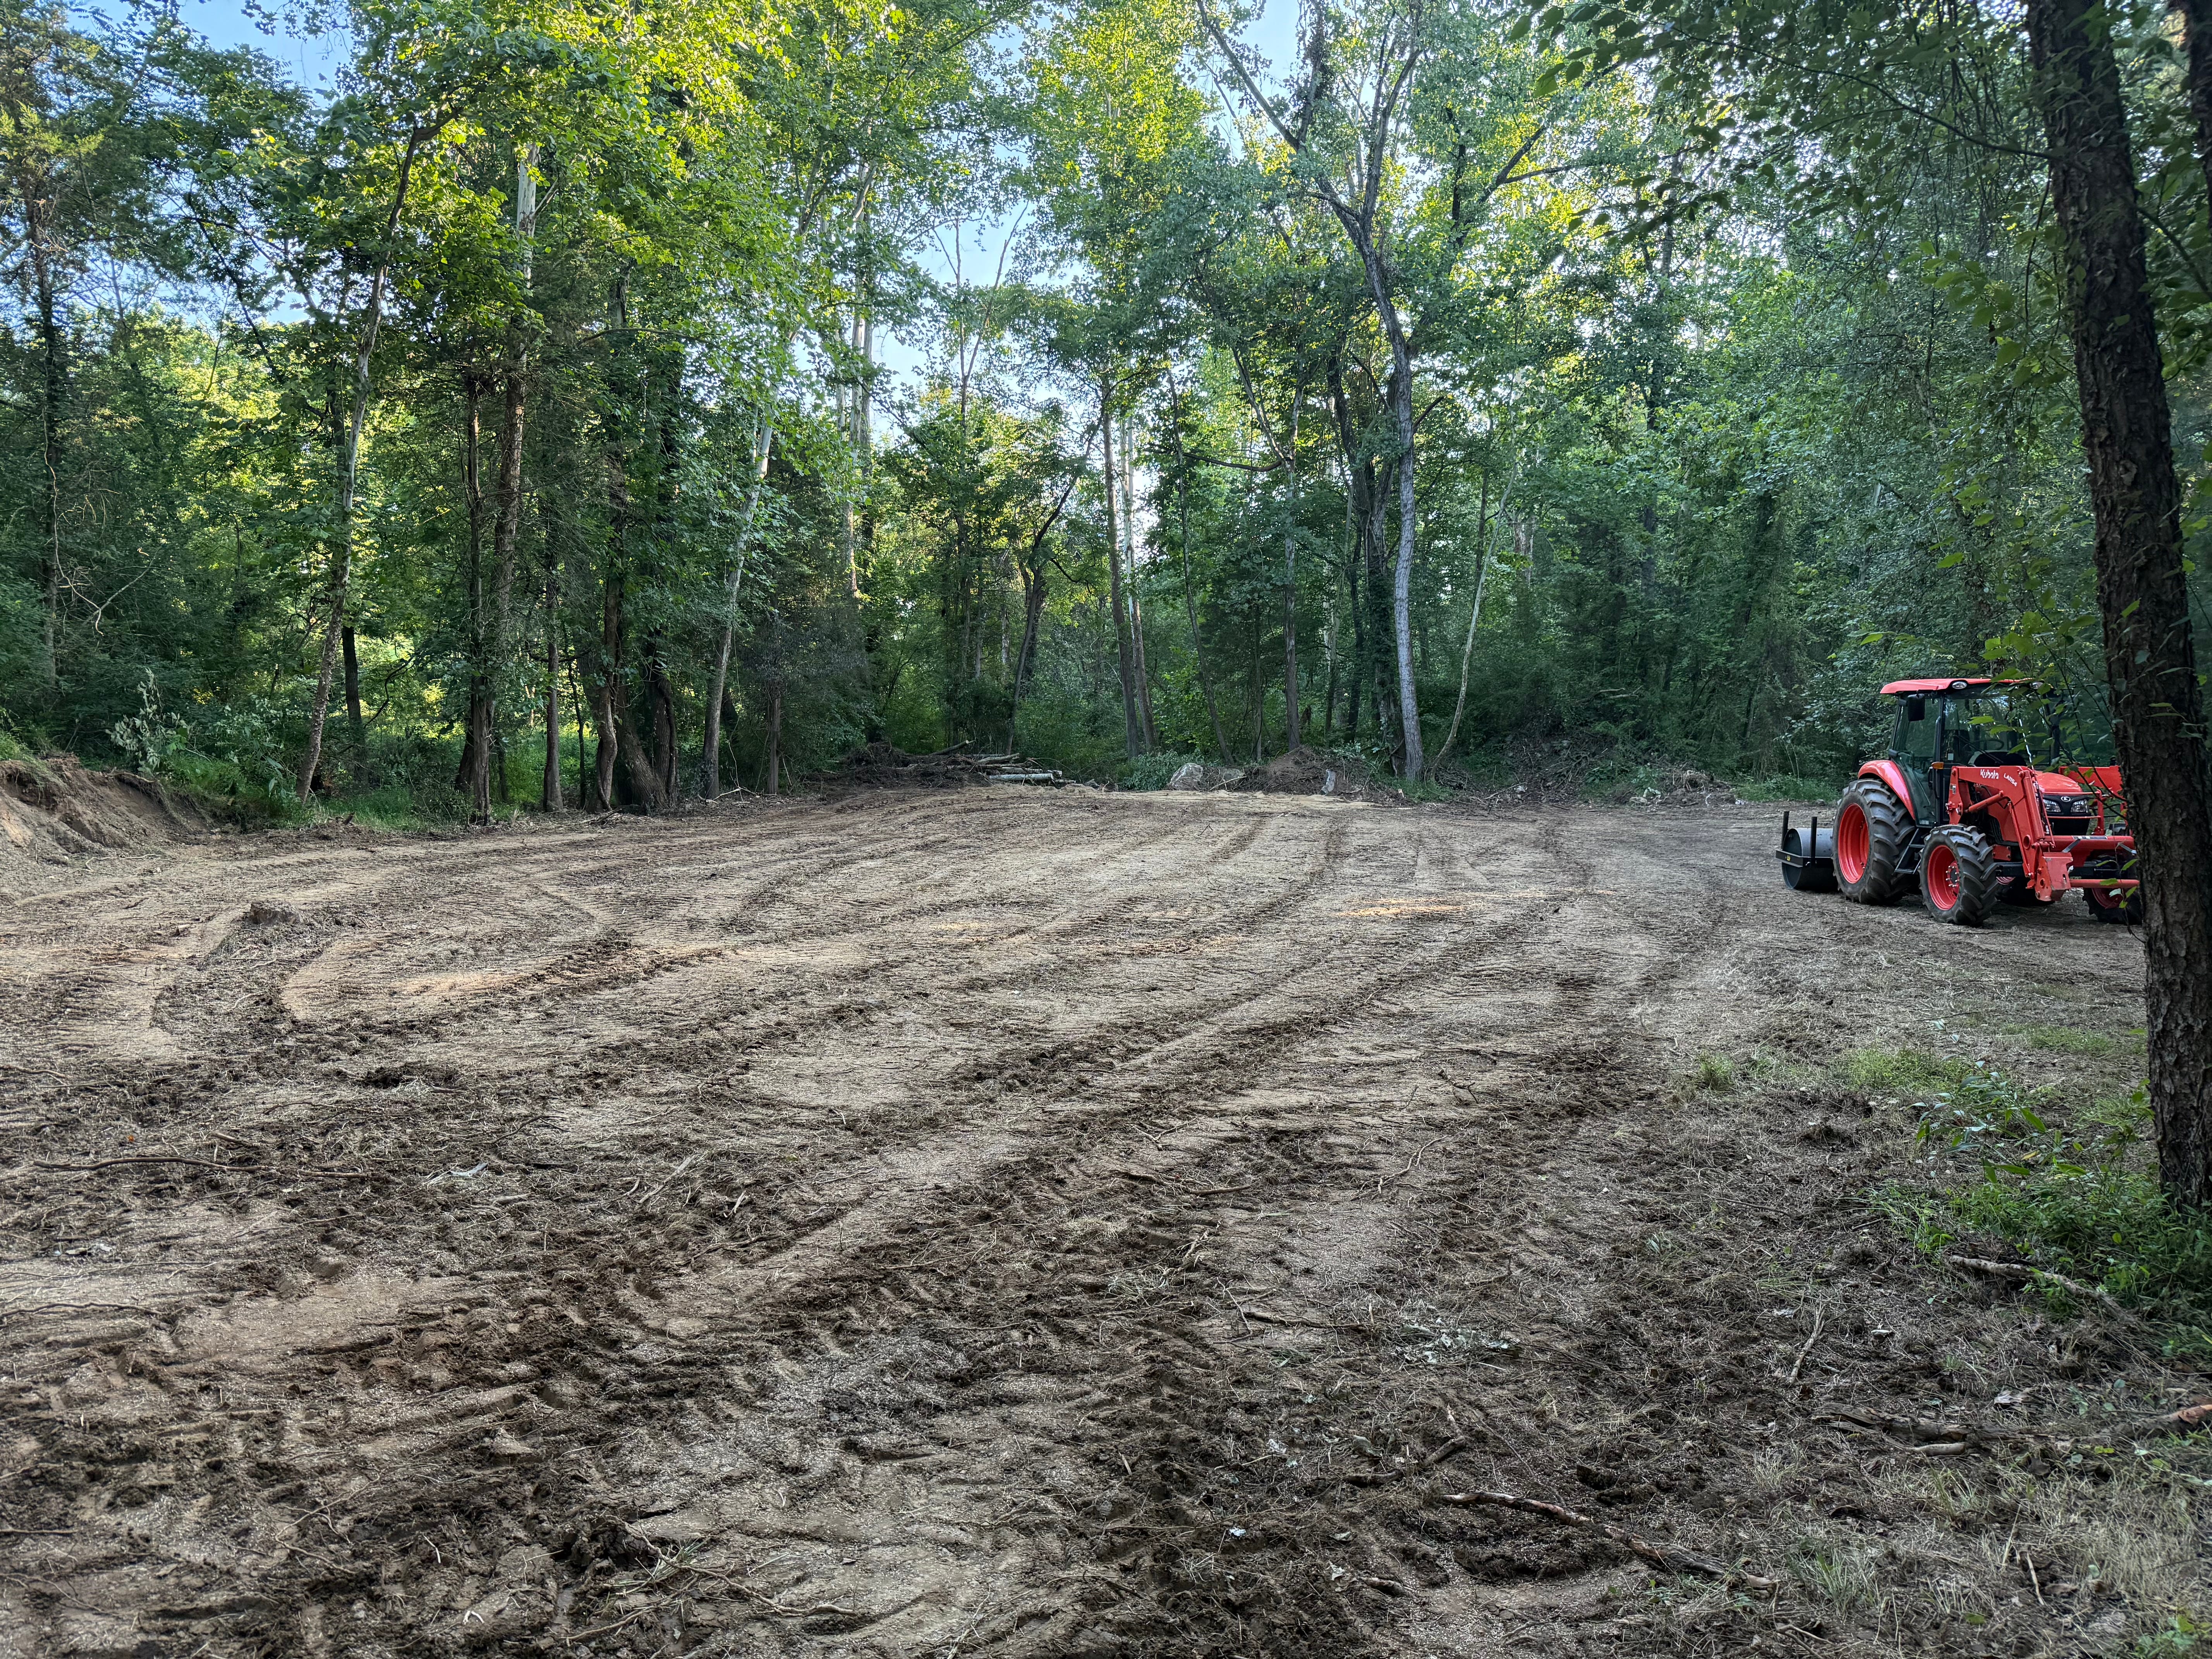
Last week, Robert tackled the enormous job of reclaiming a large stretch of land along the river that had become completely unusable. Ever since a micro-tornado took out a few trees a couple of years ago, the area had been littered with old tree stumps, piles of debris, forgotten farm “treasures,” and enough brambles to discourage anyone from walking through it.
Getting it to the point you see below took heavy equipment, countless hours on the tractor, and a lot of determination.
The payoff? We’ve reclaimed about an acre of usable land and a better walking/riding path to the river. Robert has already seeded it with a mix of clover and fescue, and if all goes according to plan, this will eventually become our farm’s shooting range.
It never ceases to amaze me how much work goes into creating what, at first glance, looks like an empty field.
Bread Making
I get into details here - so some may wish to skip this section)
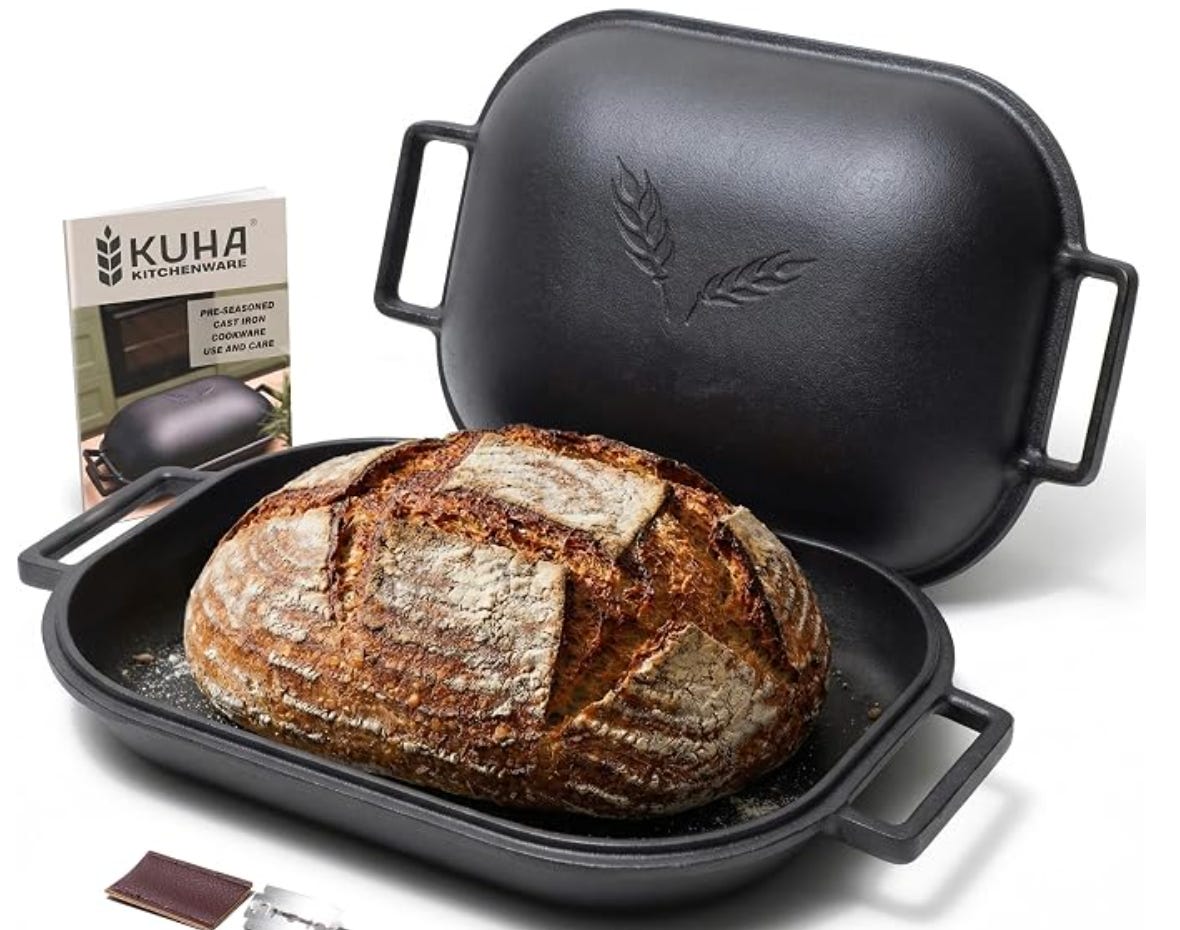
So, for years I have made about 50% of the bread we eat. I used to use a bread maker to mix the dough and for the rise, then bake it in our own oven. When I do this, I use a big cast iron bread pan or a round enameled cast iron Dutch oven. Such as this:
.
My baking method gives the loaf a beautiful crust. The basic process is straightforward:
Preheat both the oven and the Dutch oven to 450°F.
Score the loaf with one or more slashes to allow steam to escape during baking.
Place the shaped loaf on a sheet of parchment paper.
Carefully lower the parchment and dough into the preheated Dutch oven.
Slip 4 to 6 ice cubes between the parchment paper and the side of the pan.
Cover with the lid and bake for 20 minutes. The steam created inside the Dutch oven gives the loaf an excellent “oven spring,” producing a dramatic rise in the hot, humid environment.
Reduce the oven temperature to 400°F.
Remove the lid and continue baking for another 30 minutes or so, depending on the size and shape of the loaf, until the crust reaches the color I want. Removing the lid too early can limit oven spring, while taking the bread out before it is fully baked leaves the interior underdone.
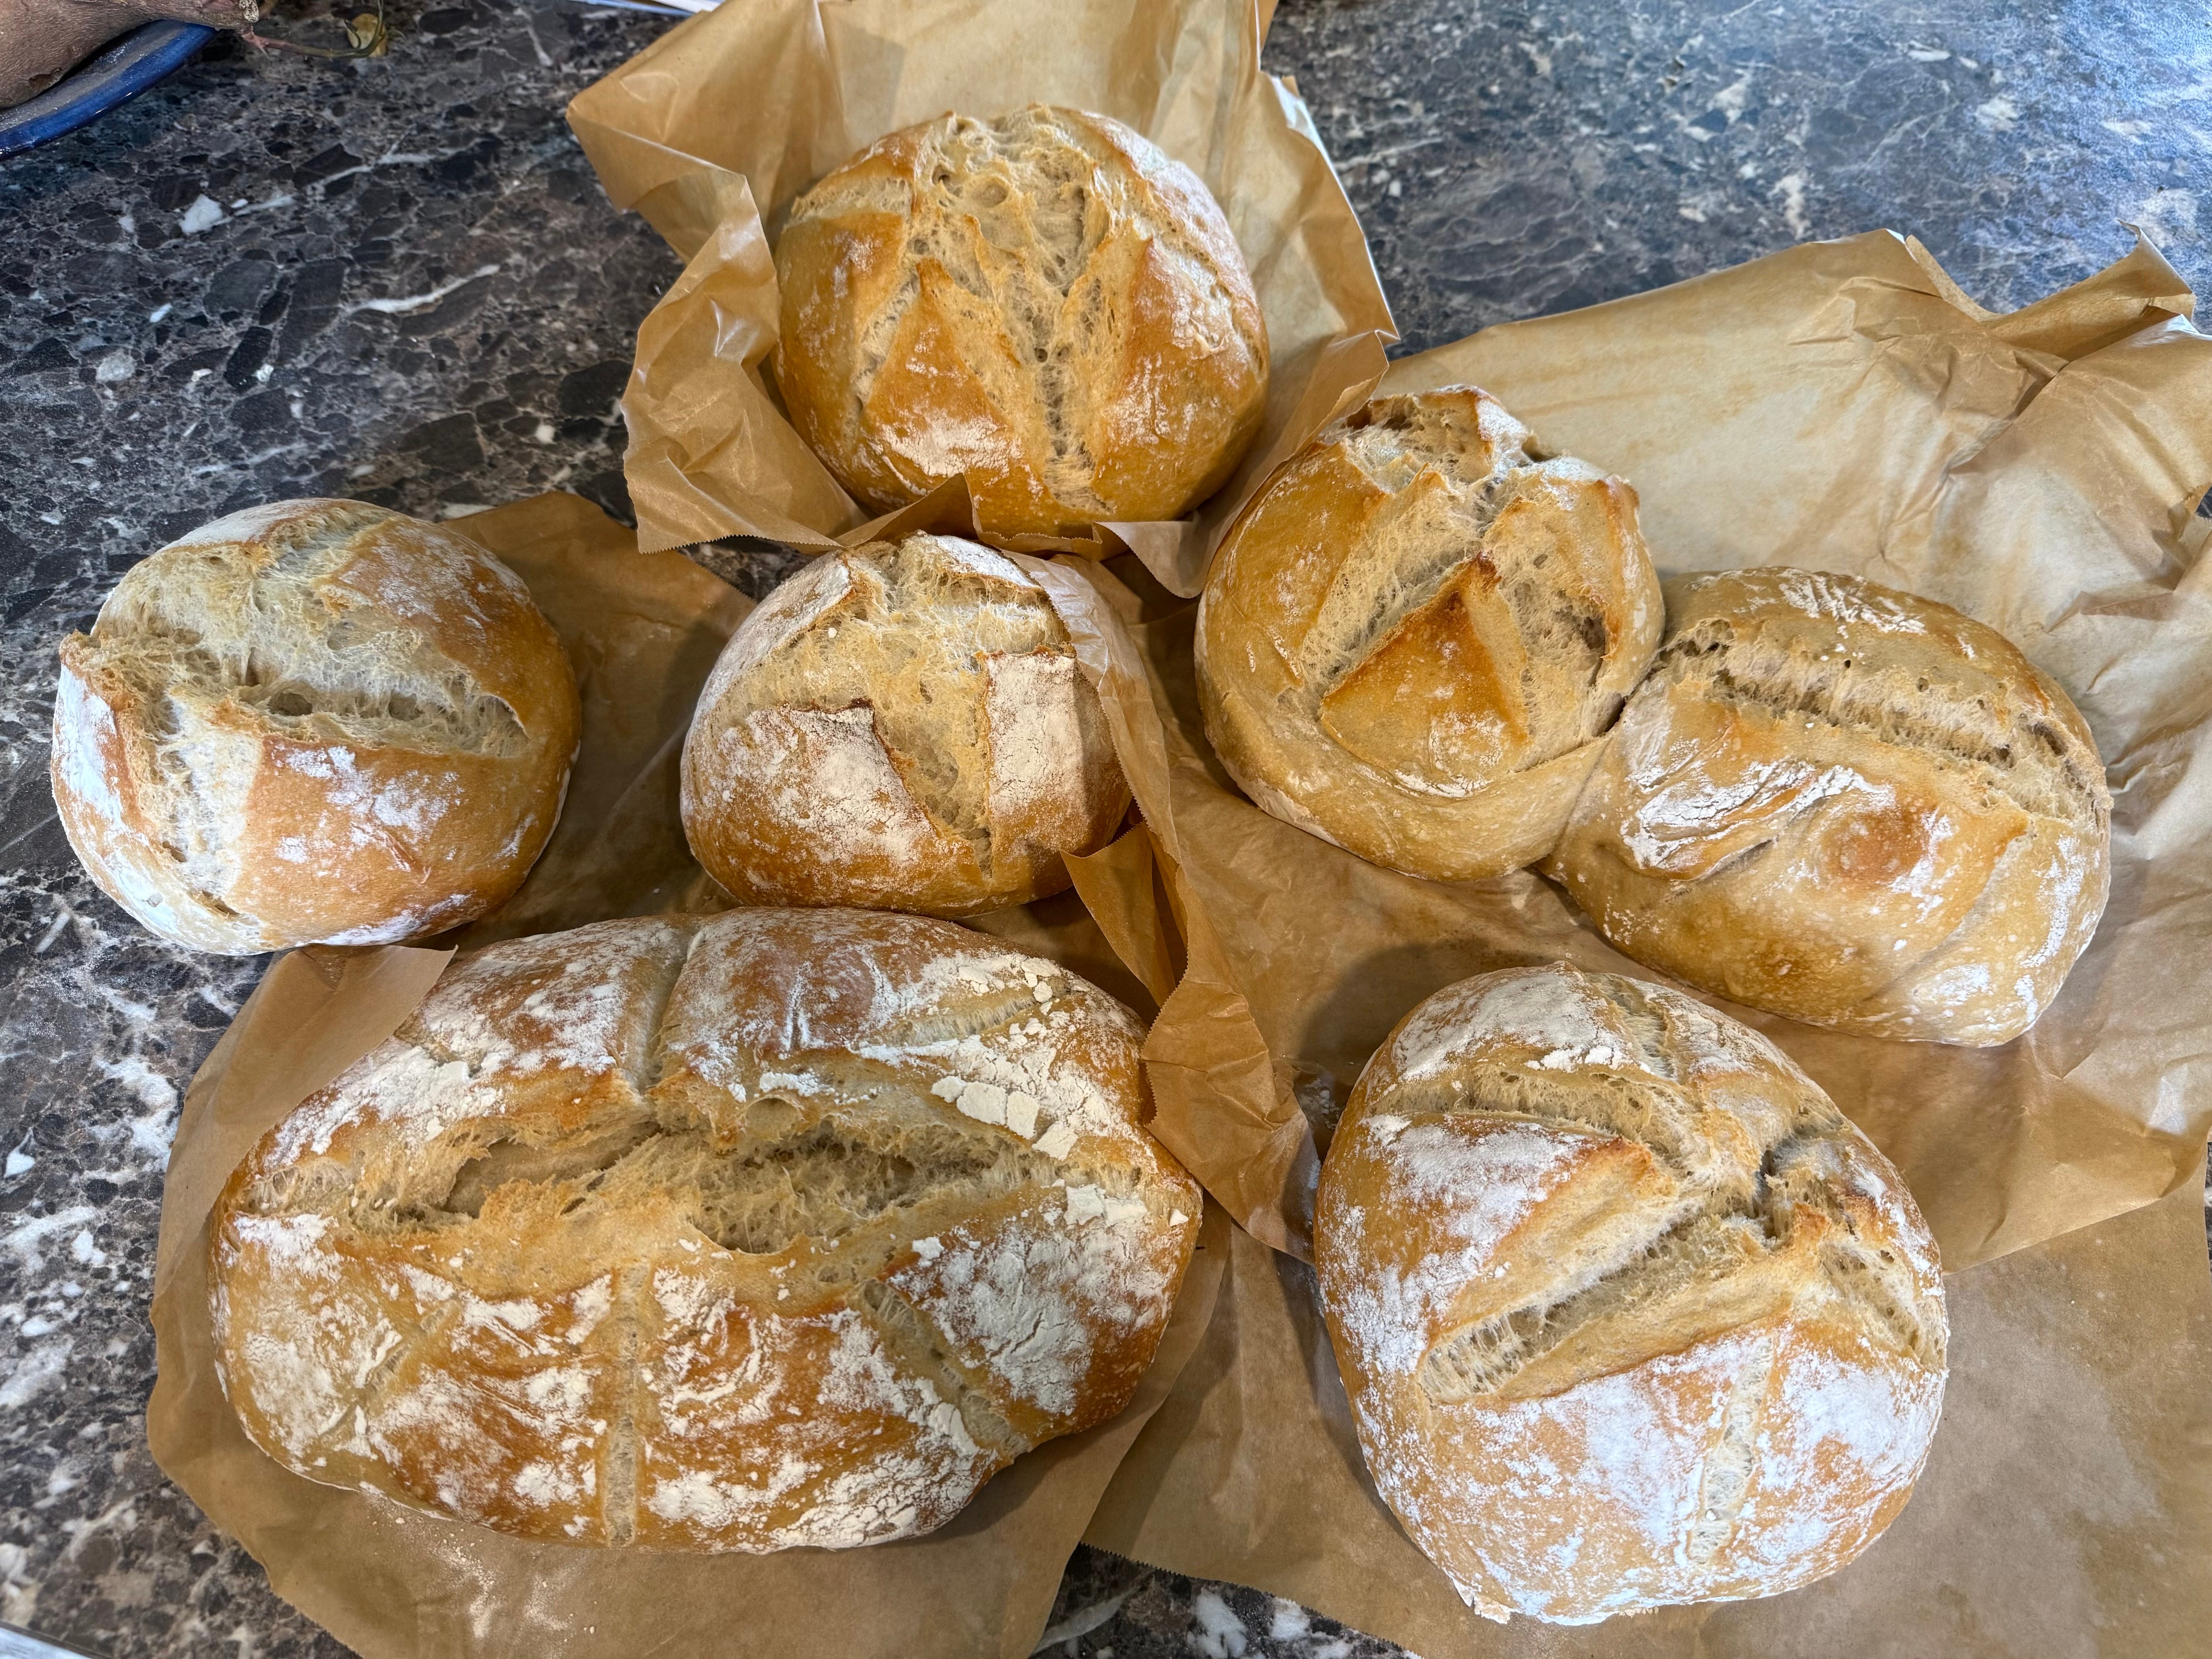
All that said, Robert still found that even my organic flour bread sometimes caused digestive upset. So, somewhat reluctantly, I turned to sourdough:
Why reluctantly? Because maintaining a sourdough culture and baking with it is a bit of a pain in the arse. It required learning an entirely new set of bread-baking skills.
The thing about baking bread is that no two loaves are ever exactly alike. Sourdough is even more finicky than commercial yeast breads. We all go through various contortions trying to make every loaf as consistent as the last, but countless variables get in the way. Humidity, room temperature, water temperature, the activity of the starter, flour characteristics, fermentation time, and proofing time all affect the final loaf. Those of us who bake regularly become almost superstitious about repeating exactly the same routine every time.
Taking on sourdough meant learning a whole new set of variables.
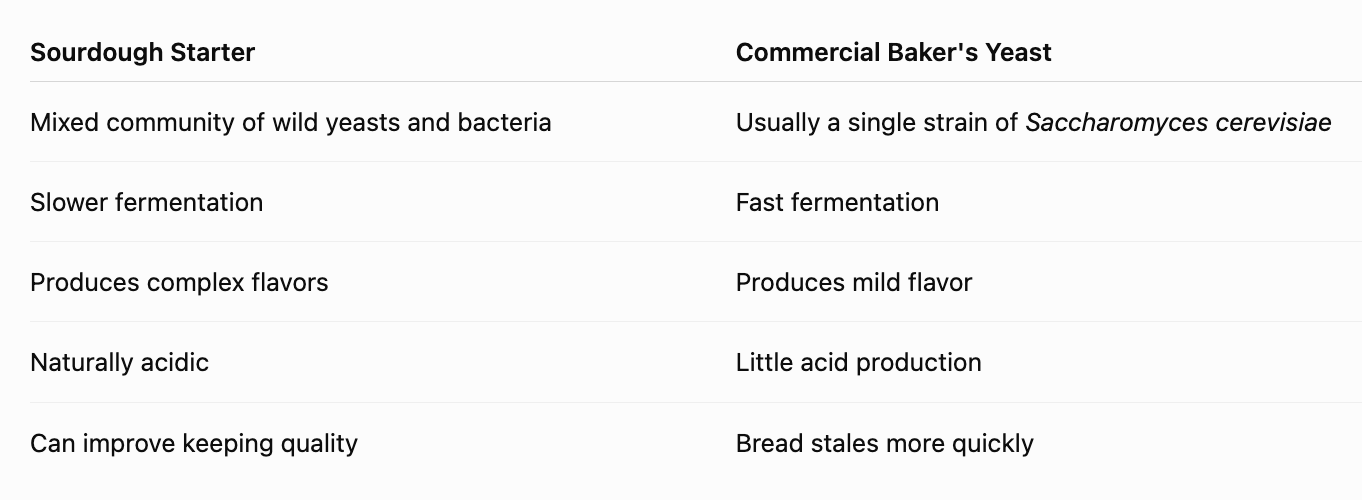
Unlike commercial baker’s yeast, a sourdough “mother” is a living culture containing both wild yeast and beneficial bacteria. During fermentation, those bacteria break down some of the gluten and other wheat proteins while producing organic acids that many people find make the bread easier to digest. It is important to note that sourdough is not gluten-free. Gluten is reduced, not eliminated.
Having kept a sourdough mother alive for months at a time before, I knew the routine was rather tedious. Traditionally, you discard about half of the starter, then replace it with equal parts flour and lukewarm water, mixing it into a paste about the consistency of smooth peanut butter. You let it sit in a warm place until it doubles or triples in size, then repeat the process. Depending on how often you bake, that can mean feeding it anywhere from three to five times each week. It consumes quite a bit of flour and can become a real time sink.
Once a healthy mother has been established, it can be stored in the refrigerator. At that point, many bakers feed it about once a week, allowing it to become fully active before returning a portion to the refrigerator until the next feeding. Even then, it requires regular attention and enough time at home to keep the culture healthy.
So I came up with another approach.
Instead of discarding starter, I kept building it until I had enough active starter to make roughly ten to fifteen loaves of bread. I then go through the rather tedious process of mixing, fermenting, shaping, and baking that entire batch at once before freezing the finished loaves. As one can’t do the entire batch all at once, without a commercial kitchen, so I have to sequentially weigh, mix, knead, rise, knead again, proof, refrigerate, etc. For basic directions or to learn more about sourdough baking or feeding a mother, I recommend this site and then scale up…
Now I no longer have to bake bread every week, or even every month. Instead, I simply pull a loaf from the freezer, let it thaw, and we have fresh sourdough whenever we want it. Rather than interrupting my schedule every week, I spend a couple of busy days baking every two or three months.
Whew. More work on those baking days, but far more manageable with my schedule. And I can schedule when I want to take on this homesteading project. So, I can control the sourdough - rather than it controlling me.
Even with this system, though, the mother still needed to be fed every week, which is essentially a 24-hour process.
A Few Tips for Baking Bread
Weigh your ingredients. A digital food scale costs well under $15 and will last for years. It is one of the best investments you can make if you want consistently good bread.
If you’re making yeast breads, consider using a bread machine for mixing and the first rise. Personally, I’m not fond of the crust a bread machine produces, so I use it only for kneading and proofing before baking in a Dutch oven using the method described above. If you’re just beginning your bread-making journey, though, a bread machine can be a great confidence builder. New ones aren’t inexpensive, but thrift stores often have them for a fraction of the retail price.
Don’t rush the process. Good bread rewards patience. Most disappointing loaves come from trying to hurry the rise or shorten the fermentation time.
Don’t expect 100% whole wheat bread to behave like white bread. Whole wheat contains the bran and germ, which interfere with gluten development and produce a denser loaf. For yeast breads, I recommend starting with a 50:50 blend of whole wheat and white bread flour. For sourdough, I generally use about one part whole wheat to five parts white flour, although you can gradually increase the whole wheat as you gain experience.
Experiment with different crust finishes. Dust the loaf with flour for a rustic look, brush it with egg or egg white for a glossy crust, or use milk or water for a softer finish. Sprinkle on sesame, poppy, or other seeds before baking for both flavor and appearance.
Consider grinding your own wheat berries for the whole wheat portion of the flour. Hard white wheat berries are my favorite because they produce a lighter, sweeter whole wheat loaf than hard red wheat. I typically buy 50-pound bags of organic hard white wheat berries along with organic white bread flour. Stored in a cool, dark, dry place, such as a closet or pantry, both will keep for at least a year. The biggest risk is pantry pests like grain moths or weevils. I haven’t had an infestation in years, but it’s always something to watch for.
Grinding your own flour is surprisingly easy. A Vitamix or another high-powered blender will grind wheat berries into flour in about a minute on high speed. Most can handle about 1½ to 2 cups at a time. I usually grind enough flour to last about two months, which gives me the flavor and nutrition of freshly milled grain without having to grind flour every time I bake.
Then I stumbled onto another trick that completely changed how I think about maintaining a sourdough mother.
You can simply dehydrate it.
That means no more weekly feedings if you don’t feel like baking for a while. No worrying about the starter dying in the back of the refrigerator while you’re traveling. No guilt over neglecting it. Enquiring minds want to know: is it weird to have guilt over sourdough mother neglect? Just dry it, store it, and bring it back to life when you’re ready.
The method below is adapted from King Arthur Baking, with a few tweaks that have worked well for me
How to Dehydrate a Sourdough Mother
1. Start with a healthy, active mother.
Feed your starter just as though you were getting ready to bake. If it has been living in the refrigerator, let it come to room temperature and feed it equal parts unbleached all-purpose flour and lukewarm water. Leave it covered until it is bubbly, active, and at its peak.
2. Spread it out as thinly as possible.
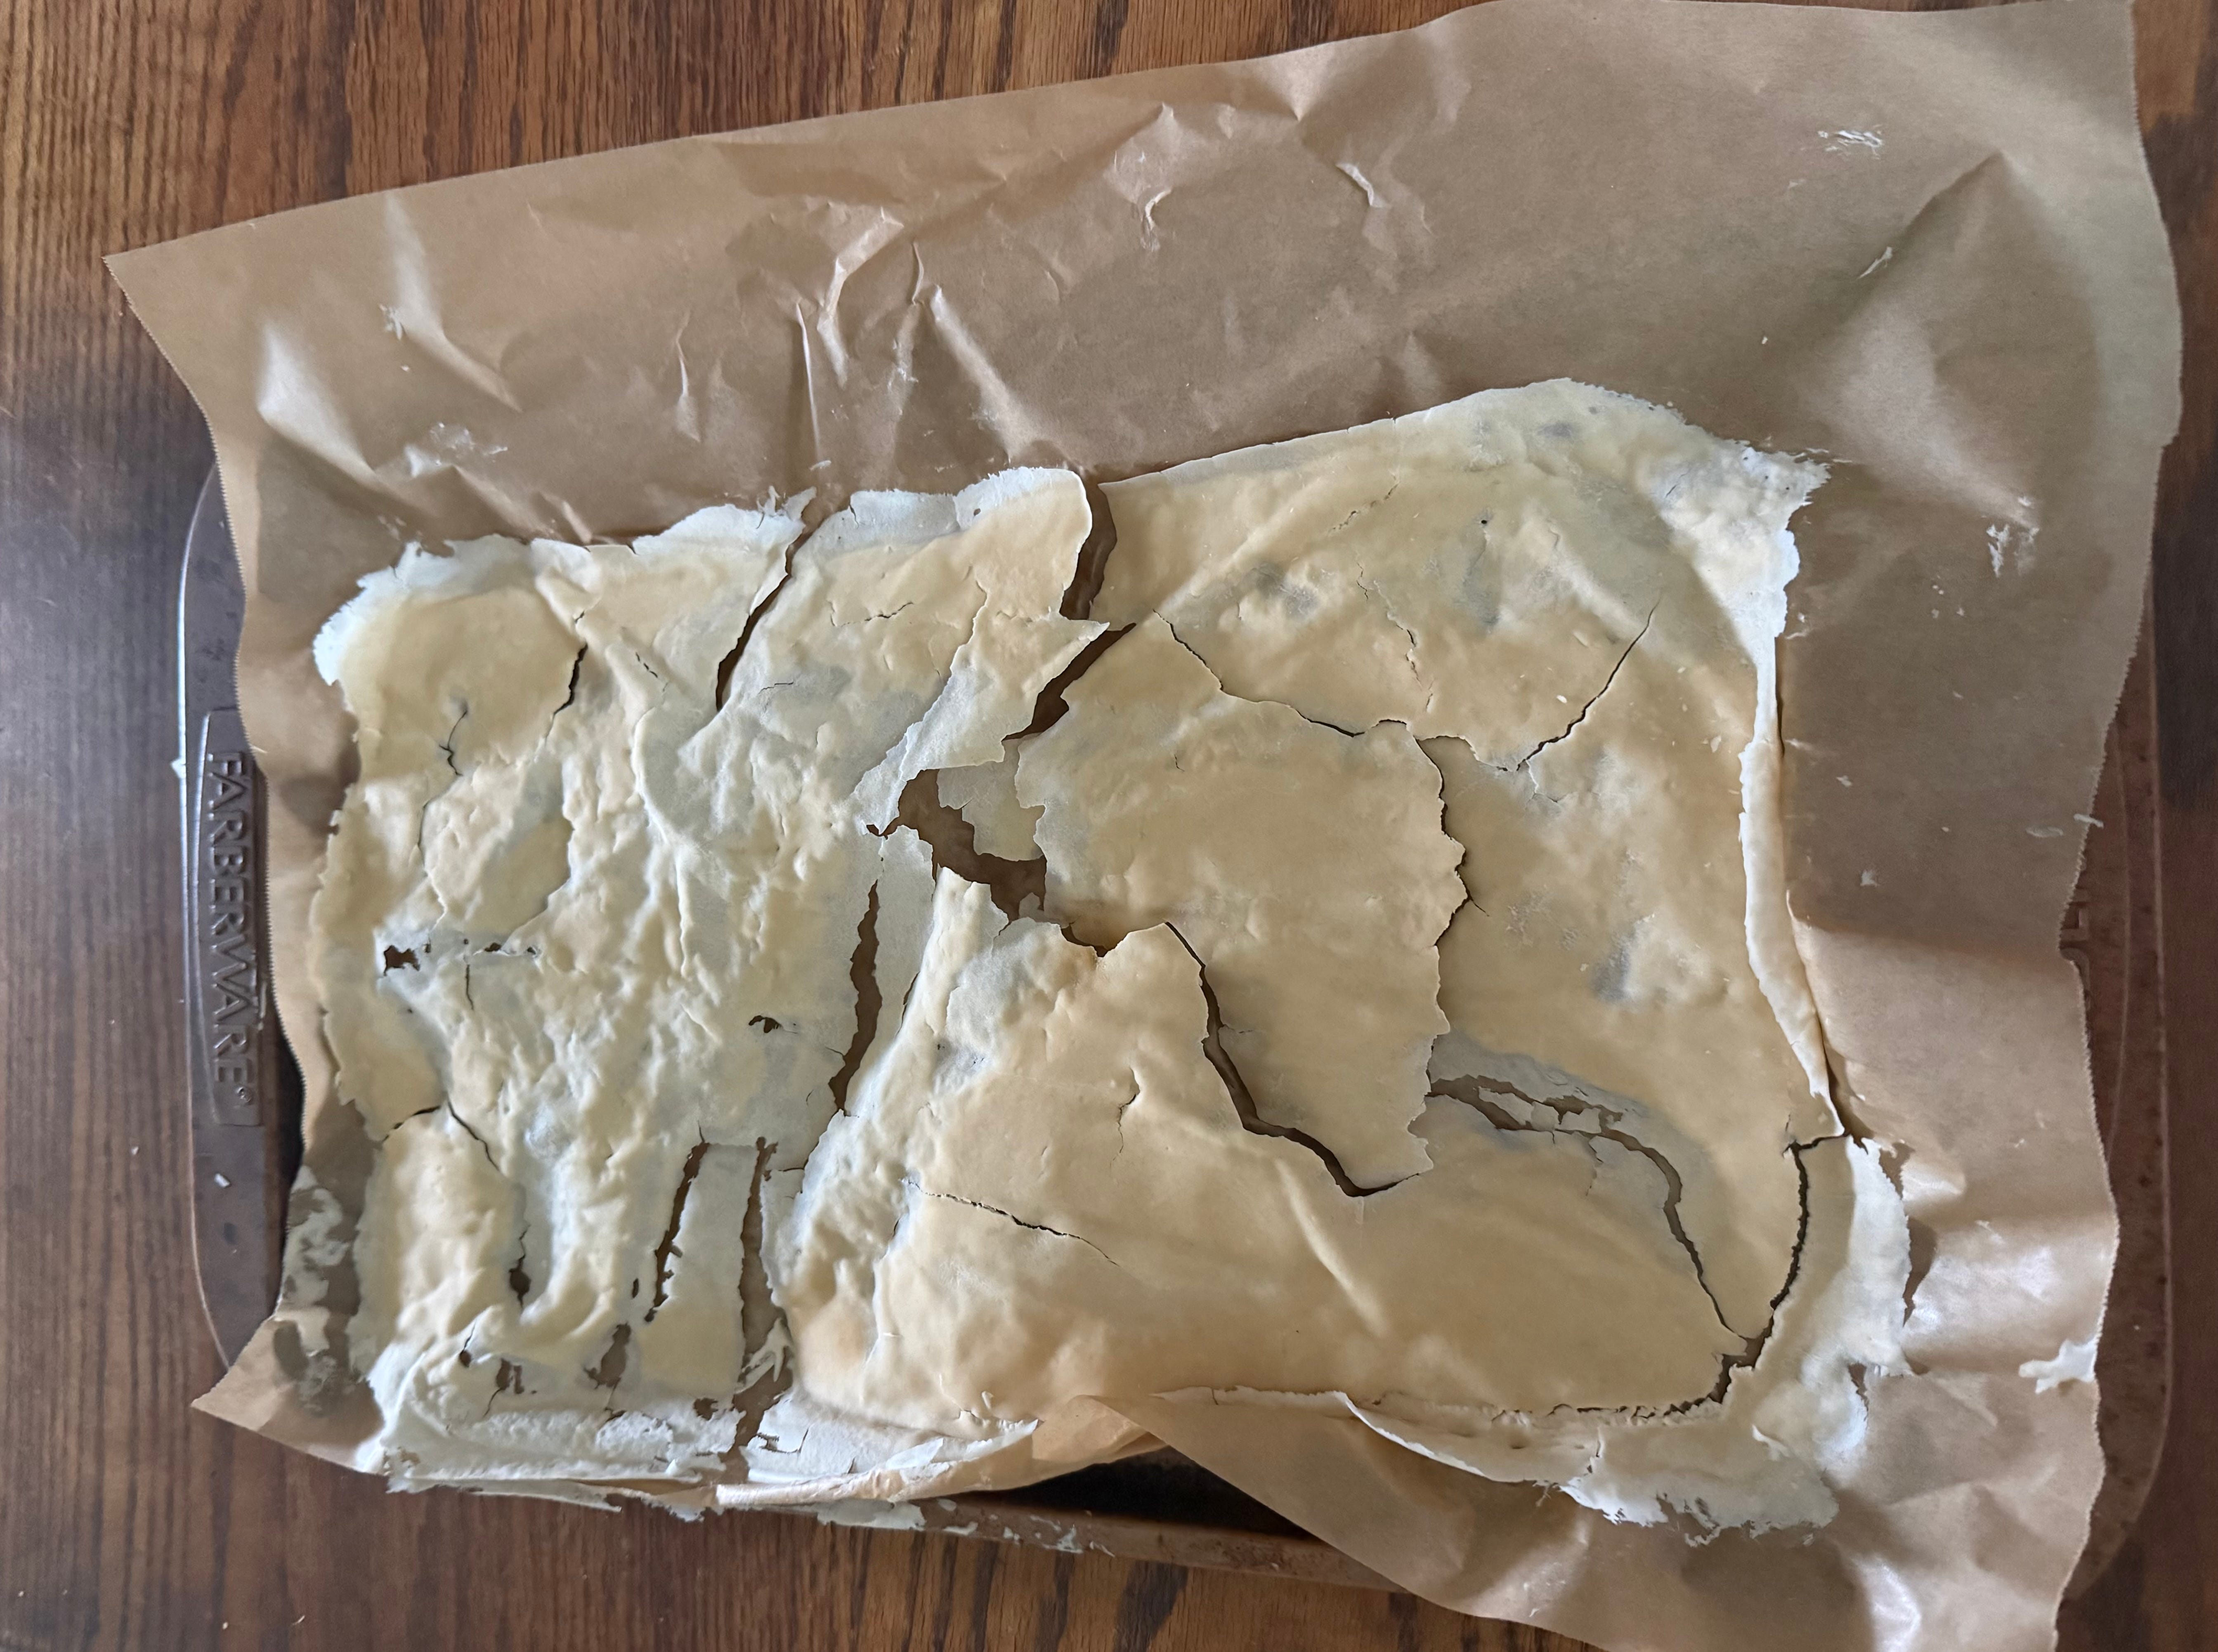
Spread the entire starter onto parchment paper. I usually divide it between two sheets simply because it is easier to handle. Use an offset spatula, silicone spatula, or bowl scraper to spread it into a very thin layer. The thinner the layer, the faster and more evenly it dries.
3. Let it dry completely.
This is the part where patience comes in.
Leave the starter to dry at room temperature until it is completely brittle. Depending on the humidity where you live, this can take anywhere from a day to nearly a week. Virginia summers take considerably longer than an Arizona desert.
If you live somewhere humid, you can speed things up by placing the trays in your oven with only the oven light turned on. The tiny amount of heat from the light is usually enough to help the drying process. Do not turn on the oven itself. Too much heat will kill the wild yeast and beneficial bacteria that make sourdough work.
When the starter is fully dry, it should peel easily from the parchment and snap cleanly between your fingers.
Tip: If you don’t have parchment, just spread it on a clean cookie sheet - and use a spatula to scrape the dried starter off when ready.
Storing the Dried Starter
Break the dried starter into small flakes.
You can certainly store the flakes as they are, but I prefer running them through a food processor for a few seconds. That reduces them to coarse flakes or powder, which cuts the storage space to about one-quarter of the original volume.


Store the dried starter in an airtight glass jar. Label it with the date so that months later no one mistakes it for something that belongs in the compost.
Keep the jar in a cool, dark, dry place. It doesn’t need refrigeration, just reasonable storage conditions. A pantry or closet shelf is perfect.
Properly dried, the starter will keep for a very long time. Some bakers have successfully revived starter that was stored for years.
Bringing It Back to Life
When you’re ready to bake again, simply measure out about one ounce of the dried starter, roughly one-eighth of the amount you originally dried. If you don’t own a scale, this is approximately one-quarter to one-third of a cup, depending on how finely you crushed it.
Place the dried starter in a bowl with lukewarm water and let it soak until it has completely softened. Then begin feeding it just as you would any other sourdough starter, using equal weights of flour and water. It usually takes two or three feedings before it becomes vigorous enough for baking.
For me, this has become the ideal solution. I no longer feel obligated to babysit a sourdough mother every week simply because I own one. Instead, I keep a dried backup in the pantry. If my refrigerated starter dies, gets contaminated, or I simply haven’t baked in months, I can revive it in a couple of days and be right back where I started.
An added benefit: I now keep a dehydrated colony of different starters, so I can add a little variety to my baking
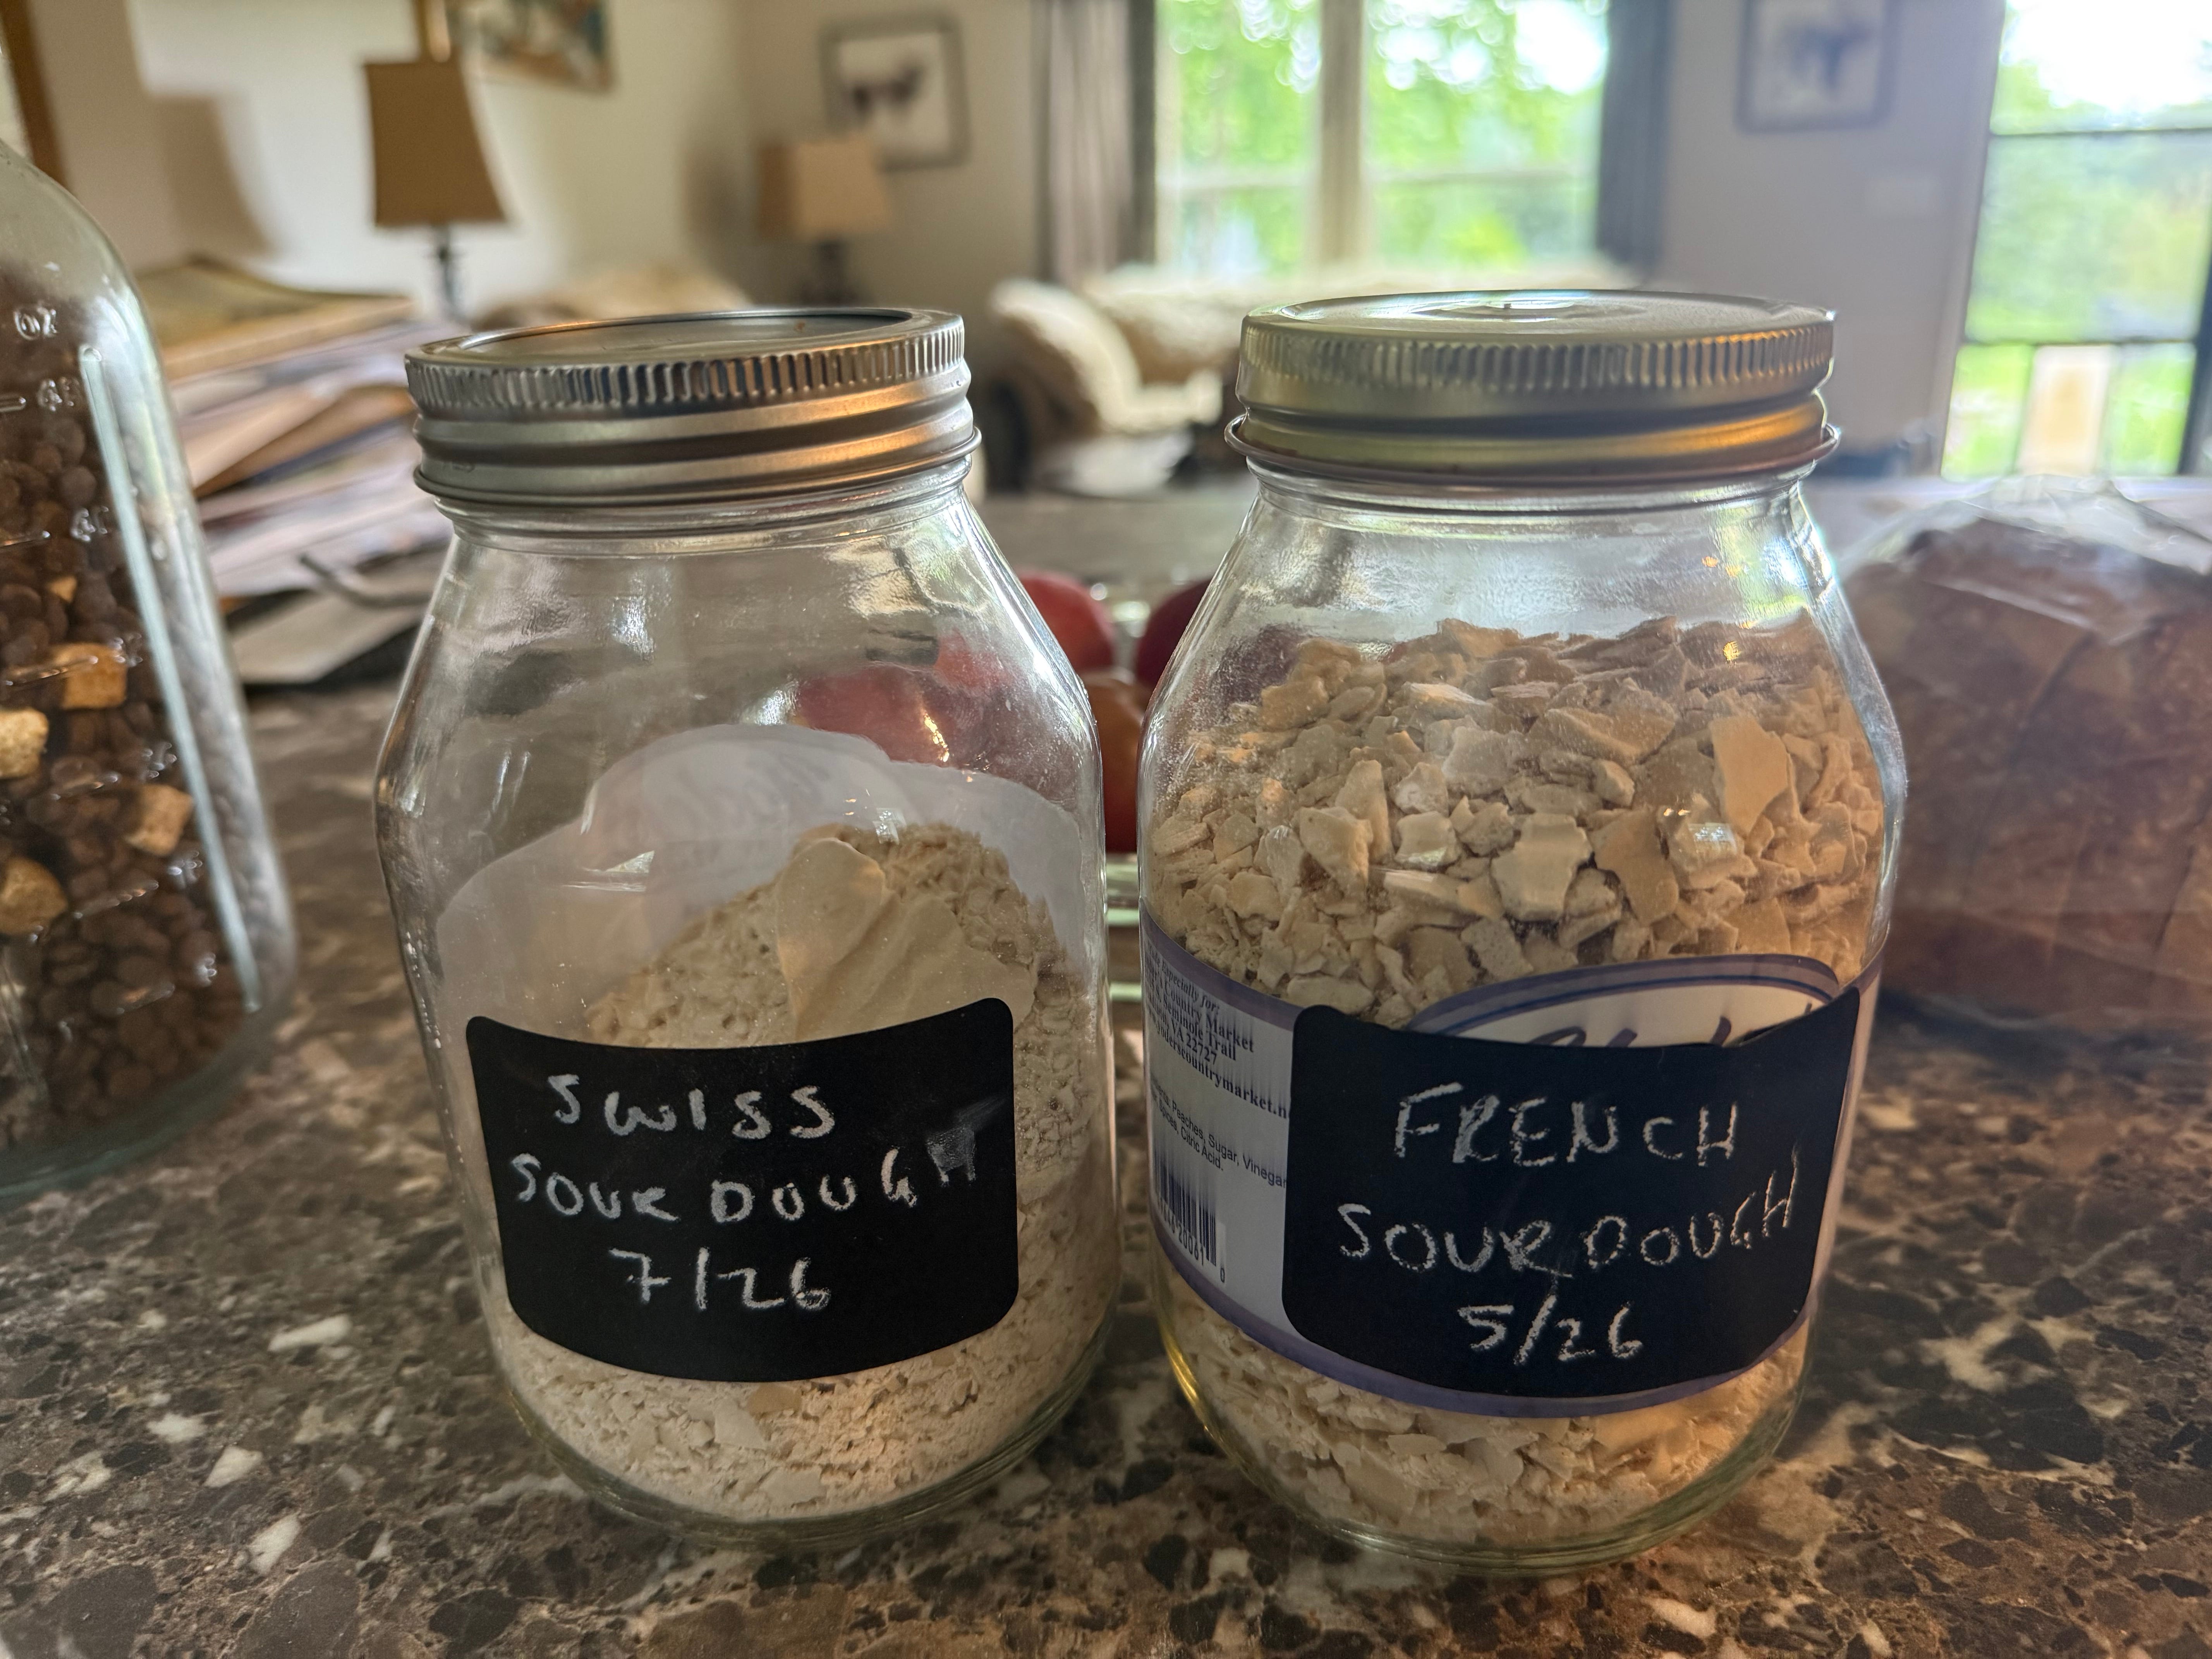
.
Sometimes the simplest solutions really are the best ones.
The Camel
For those of you who aren’t nearly as fascinated by bread baking or volunteer pumpkin plants as I am, here’s a little reward: a short video from our trip to Israel.
No surprise to anyone that I found a camel to ride…
One thing that surprised me was learning that many Bedouin families in Israel still work hard to preserve their traditional way of life. Another discovery? Their obvious appreciation for camels.
Really, who could resist climbing aboard a camel in the parking lot of a gas station, somewhere out in the middle of nowhere, not too far from the Dead Sea?
Apparently, not me.
This has now become a running joke in our family. OK… Well... mostly in my head. The question is whether a camel would make a good addition to the farm?
Having now ridden one, I have to admit I’m leaning toward “yes.”
There are obvious advantages. They eat brush, they’re undeniably entertaining, and camel milk is reputed to have a number of health benefits.
So perhaps not just a camel.
Perhaps... camels?
Since Robert is with the delegation touring Israel and attending events on combating antisemitism - which is shockingly running rampant in the Western world, he won’t be editing this Substack or talking me out of any questionable livestock decisions.
So I’m taking advantage of his absence.
Time for a poll.
If you’ve made it this far, you’re probably the kind of person who still enjoys learning how to do things the old-fashioned way. How to bake real bread. How to grow food. How to preserve seeds. How to become just a little less dependent on systems that seem to get a little more fragile every year.
That is what Homesteading for Health is really about.
Every week, I try to share something practical, something we’ve learned through trial and error, and occasionally through spectacular failure. (Fortunately, there are usually stories to go with the failures.)
If you enjoy these essays, please consider becoming a paid subscriber. Paid subscriptions make it possible for us to keep writing, experimenting, researching, filming, and sharing what works, what doesn’t, and sometimes what unexpectedly sprouts out of the compost pile.
Thank you for coming along on this adventure. I promise there will almost certainly be more bread, more gardens, more questionable livestock ideas... and probably at least one camel discussion in the future.

Finally, our Homesteading for Health book will be available on August 4th!
My simple request for those who have or will order copies: please, please, please leave a book review on Amazon! This can’t be done until after the book has shipped, but please remember to do so. It would be much appreciated by both Robert and me.

Now off to catch up with the delegation and the activities for the afternoon
JGM
I had the pleasure of meeting Robert when he spoke at an event near Cincinnati 4 years ago. The effort that you have both made with physical work and good nutrition is so evident in the pictures. Thanks for all the work that you both put into writing this Substack.
Nature is amazing. I live 450 miles north of Toronto Canada. The carrots I haven't eaten in the fall stay in the ground through winter and are pulled up and eaten early the next summer. After having been covered with up to 6 feet of snow for almost 6 months with temperatures regularly 40 below zero, they are delicious and much sweeter for having been in the ground through the winter. I'm also amazed that I can eat wonderful lettuce even after the frost and snow of early winter. I just brush the snow off and it's in perfect condition.